Here are photos of the linings for the two ukes. The top photo shows the kit's lining system and the second is the one based upon a traditional guitar binding.

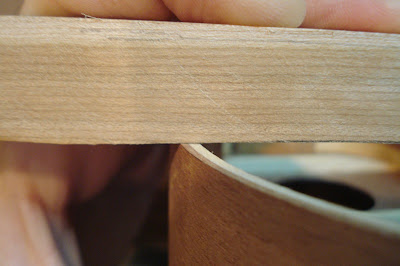
The next two photos show the profiles of the linings for the ukes. A piece of wood was made that had an arch cut into it that exactly matched the curve to the back piece for the uke. When it was held up to the kit's linings it showed that they were so narrow that it made no difference if a bevel was sanded into the top of the linings or not. However, a small gap can be seen on the wider traditional linings on the 002 uke as seen in the bottom photo. Because the back would only be glued at the outside edge, the linings of the 002 were sanded to match the back's profile.
Here is a photo of the 002 uke with the back glued on but not yet trimmed to size.
Here is a photo of the headstocks with the mother of pearl palm tree inlays after scaping them flush with the veneer. As mentioned in the last post, you cannot see the router slip on the uke on the right because the epoxy mixed with wood dust hid it very well. If you stare long enough you can notice an area where the grain looks a little different but that's about it (it is to the right, between the trunk and the lower most leaf). These will have finish applied to tone up the wood color (the first coats of finish were used to fill the wood grain).


No comments:
Post a Comment