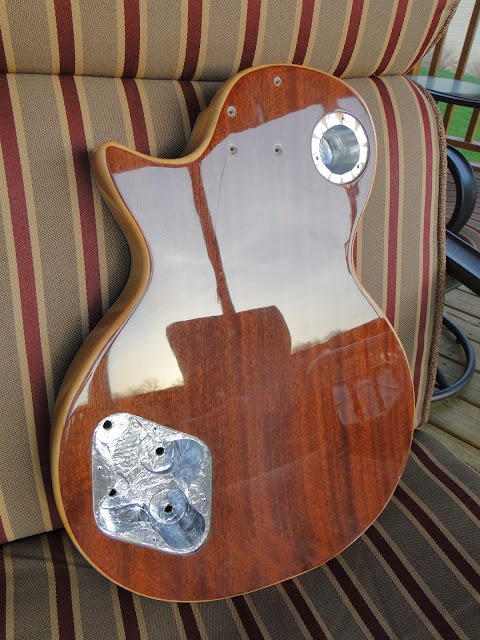
This is a copy of a review that I wrote for Harmony Central earlier this year. I'm posting it here to consolidate my information all in one place. The finishing process used here is the same as the one in an earlier post and shows what the finish looks like on a nonpainted surface.
I started out by checking the truss rod on the neck. I tightened it fully and found that the neck still had about .008" of relief in it. From what I've read, it is best to be able to fully flatten the neck on a non-stringed guitar because this gives you the most options for setting relief once the neck is under string tension. Because I was not fully convinced that the neck would work out, I finished off the body, installed the electronics and played the guitar with an unfinished neck for about a week to convince myself that the neck would work out before I spent the time required to get a good finish on it. The body has a thick layer of sanding sealer on it and the quality of the bookmatched maple was better than I expected. I applied seven coats of nitrocellulose lacquer to the body and allowed the lacquer a week to cure before wet sanding with 600 -> 1500 grit paper. I then hand buffed with rubbing compound and moved to finishing compound. This took several hours to complete but the finish is outstanding.
As you can see in the photos, I lined all of the electronics cavities and backs of the cover plates with aluminum tape. A ground wire had to be added to the selector switch and continuity between the shielding was confirmed with a multimeter. I did replace the jack with one that has a more positve latching mechanism.
All of the electronics were connected via solder rather than the snap connectors included in the kit but the shrink insulation was used to protect the connections from short circuits.
The frets on the neck were checked for proper seating using a fret rocker and several were found to be proud by a few thousandths on an inch. A firm tap with a soft headed hammer was able to bring all of the frets into proper position. Two of the holes for the tuner retaining screws were slightly misaligned and had to be filled with a toothpick and redrilled, otherwise all of the holes and machined recesses were spot on. I did replace the tuners with some of higher quality since there was some play in the gear mechanism of the tuners included with the kit.
The guitar plays very well and the overall quality of the kit was very good for the price. It has held up well over the last year considering I play it a lot and it is also my teenage son's favorite guitar to borrow. I recommend this kit to anyone who would like to build a custom Les Paul style guitar.
I started out by checking the truss rod on the neck. I tightened it fully and found that the neck still had about .008" of relief in it. From what I've read, it is best to be able to fully flatten the neck on a non-stringed guitar because this gives you the most options for setting relief once the neck is under string tension. Because I was not fully convinced that the neck would work out, I finished off the body, installed the electronics and played the guitar with an unfinished neck for about a week to convince myself that the neck would work out before I spent the time required to get a good finish on it. The body has a thick layer of sanding sealer on it and the quality of the bookmatched maple was better than I expected. I applied seven coats of nitrocellulose lacquer to the body and allowed the lacquer a week to cure before wet sanding with 600 -> 1500 grit paper. I then hand buffed with rubbing compound and moved to finishing compound. This took several hours to complete but the finish is outstanding.
The guitar plays very well and the overall quality of the kit was very good for the price. It has held up well over the last year considering I play it a lot and it is also my teenage son's favorite guitar to borrow. I recommend this kit to anyone who would like to build a custom Les Paul style guitar.


No comments:
Post a Comment