Showing posts with label Basswood. Show all posts

Wednesday, April 6, 2011

Wooden mixer rack

I needed a rack that would mount my mixer on an angle as well as allow airflow under it for cooling.
This rack is made of 1/4 inch basswood and the cross member slats that support the mixer are rabbeted into the front and rear supports for extra strength.  A small  lip was added to the front edge to keep the mixer from sliding off.

Pinewood Derby Hershey Bar and Bus

Here are the pinewood derby cars that Zac and I made this year.

His is the Hershey Bar and mine is the Webelos School Bus.  He saw a Hershey bar car in an issue of Boy's Life magazine last year and he has been planning on building one all year.  The car is super easy to build because there is no paint, just some aluminum foil and a Hershey's wrapper.  Spray adhesive was used to secure the coverings and about 3 oz of weight had to be added to the car to make it 5 oz.
The Hershey Bar Car turned out to be really fast and won the Pinewood Derby.  I think that having all of the weight in the rear and having a low center of gravity helped make this happen.  My personal opinion is that the axles and wheels are most important part of getting the best speed possible.  Well polished and true axles with good graphite as a lubricant is a must.  Our pack does not allow increasing the wheel base but I am told this helps and running on three wheels helps reduce rolling resistance.

My car is the same as I usually make each time I am leading Webelos because it is the last year that the boys will be racing pinewood derby cars and I have the bus as a keepsake to remember them by.  The photos are from their yearbook and all of the details on the bus are printed on decal paper.  The bus is the opposite of the Hershey bar because it needs to be hollow to make it weigh 5 oz.

Friday, January 7, 2011

Scratch Built 1:12 Peterboro Canoe Conclusion

The hull is now surprisingly strong for its light weight and will get even stronger once the internal frames are added. Start by milling strips that are 1/16 by 1/32 inch in cross section. 


These are soaked and bent over the approximate strongback frames. This will prevent them from kinking when inserted into the hull.


They are placed into the hull while damp and thin CA is used to glue them in place.


A strip of plastic works as a spacer and the frames are glued into place the whole length of the hull.


Once all are in place, trim the ends and sand flush with the sheer plank. 


Thwarts of cherry were used on this model. I have a jig for making the decorative bevels in these thwarts or a rounded file can be used instead.


The frames are marked where the thwarts are to be installed and a section of the frame is removed and the thwart is glued in place.


Floor boards are milled from a contrasting colored wood (cherry in this case). Since I build many of these canoes, I have a jig for getting the proper rounding of the floor board ends.


The floor boards are glued into place and the interior of the hull is finished off. A coating of thin CA can be used over the entire interior surface to even out the tones wood finish.


The kit comes with deck boards that are undersized in my opinion. I make replacements that are oversized so that an even overlap can be made in both the cap rail and decks.


Three short segments of strip are used to finish off the planking of the stem and stern and a gentle curve is carved and sanded into these strips. The stem and stern pieces are trimmed down and a crown is made into the tops of these.


The decks are glued in place with a slight separation between the deck pieces at the far ends of these. This will be covered by a cap on top and a false keel at the ends.


As can be seen in this photo, there is plenty of excess material for forming the overhang on the hull. 


Cap rails are cut and installed between the ends of the decks.


The interface between the cap rails and the decks are cleaned up and a gentle camber is sanded into the tops of the decks.


An even overhang is shaped in the cap rails and decks.


Deck caps are installed and trimmed to size.

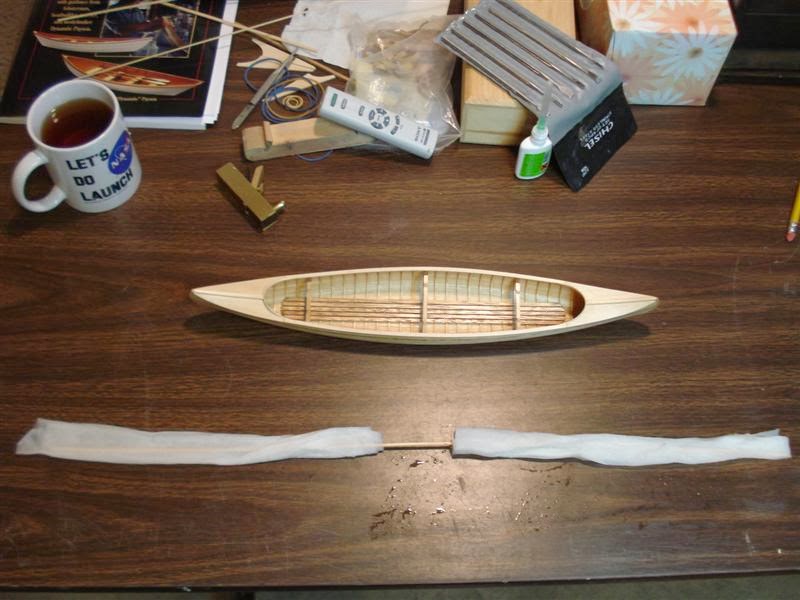
Here is a very effective method for soaking wood that works well if you don’t want to get a large container out to hold the planks. If the wood is very stiff and doesn't want to bend well, the water soaked plank/paper towel assembly can be micro-waved to steam the wood. I've used this technique several time with uniformly good success.


The false keel is bent to shape and installed onto the hull using rubber bands attached to the thwarts to hold it in place while the glue dries. 


The cockpit combings are formed using a bending jig made of MDF and then are installed into place.


Trim and profile the combings once they are attached to the canoe. 


Paddles can be made to accent the canoe display. For this particular canoe I chose traditional otter tail paddles. First find a pattern that you like and size the paddles to an appropriate length. In this case they end up being around 5 inches long. The various stages of production are shown here.


Make a pattern and trace out on basswood, cut out using a new and sharp knife. Use a plane or other tool to thin out the blade of the paddle.

Since I turn out the shafts on a drill press I carve a round section to insert into the drill press chuck. Turn the shaft.


Finish off the hand grip and smooth off the interfaces between the handle, shaft and blade.


 Here is a photo of the completed canoes. The one in front has mahogany trim and the one in back cherry. The presentation plate has been placed on the first canoe while the second is still awaiting a suitable event for presentation. I hope that you've enjoyed following along.

Sunday, January 2, 2011

Miniature Stratocaster Pinewood Derby Car

Here is the car that I built for last year's pinewood derby.


It is a miniature Stratocaster Guitar mounted on a chassis that is shaped like a guitar case.  I never raced the car because of fears of destruction as it ran down the track, but it sure looked good!  It is made with a basswood body and maple neck.  A photo of a stratocaster was downloaded from the Internet and scaled to the proper size on the computer before being printed out.  The printed copy was cut up into neck and body sections and pasted onto wood to allow for exact cutouts to be made.  I used grinders, files, sandpaper and other tools to shape the body and neck and then individual fret lines were incised into the finger board with an x-acto knife.  Some 0.25mm wire was glued into each of these fret slots to make actual metal frets and even finer wire was used for the strings of the guitar.  Some scrap sprue from plastic model kits was turned to make the knobs and sheet styrene was used for the finger guard.  Lastly, copper wire and brass tubing were used to make the cable and 1/4 inch jacks to finish out the project.  The body is painted with flaming red lacquer with clear coat over the top.  Here are a couple of other photos of the finished project.


Monday, December 20, 2010

British Phone Box Model

My wife and I lived in England for around six months back in the early 90’s and she loves old British Phone boxes so I decided to make her one this Christmas. 

I found photos on the internet that I scaled to 1:12 so the model is around eight inches tall. There are over a hundred dados and rabbets in the model so a high precision table saw was critical. The top is carved out of basswood and lined with foil as a reflector. A master crown was carved out of basswood and a mold made for casting the four crowns out of resin. The “PUSH”, “PULL” plates and the front of the A/B box are made from etched brass. The door pull was made by drilling a recess in a piece of maple and using a matching ball bearing to deform the brass to form handle. The hinges were hand made to scale from brass and the lighting consists of four high intensity white LEDs. These have appropriate resistors to limit amperage and are powered by a six volt battery pack recessed into the base. LED’s were chosen to limit heat. The “TELEPHONE” signs are 10/1000 sheet styrene with homemade decals applied to the front. The phone is carved from basswood with a brass dial. The posters and emergency dial instructions were scaled down from artwork graciously sent by Tony from Unicorn Kiosk Restorations in the UK. The tops of the phone book stands were gilded with silver leaf.