The maple bindings did not turn out as well as I had hoped so the ukes went back onto the binding router and the maple was routed off and plastic bindings were added. The necks were trued up and custom fitted to the bodies. The instructions call for mounting the finger board to the neck and then fitting the neck to the body. I figured that the finger boards would get in the way with fitting and finishing so I opted to leave them off at this point in time. Ukes have nylon strings and short necks so I figure that there will be minimal stress on the necks and little back bow because of the little string stresses. This means that the neck should be flat in relation to the tops of the uke body. It is critical that the neck joint be perfect because the action of the uke (geometry of how the strings lie in relation to the fret board) depends upon this. I used the trick of using double sided tape to fix sandpaper onto the body of the uke and ran the neck up and down this so that the exact shape of the body was cut into the neck joint surface. A single dowel was drilled into the body and neck to help strengthen the joint. Here is a photo of the glue up.
Here are the ukes after the glue up was done. I used CA glue to put the bindings on which is why there is shellac on both bodies to prevent the CA from wicking up the grain and marring the finish (it is not a sunburst finish, although that is not a bad idea...).
These are a series of articles detailing projects that I've built. Click on the Blog Archive arrows to expand the months and see more articles that posted here...
Showing posts with label Wood. Show all posts
Thursday, November 24, 2011
Sunday, November 6, 2011
Ukulele Build Part 9
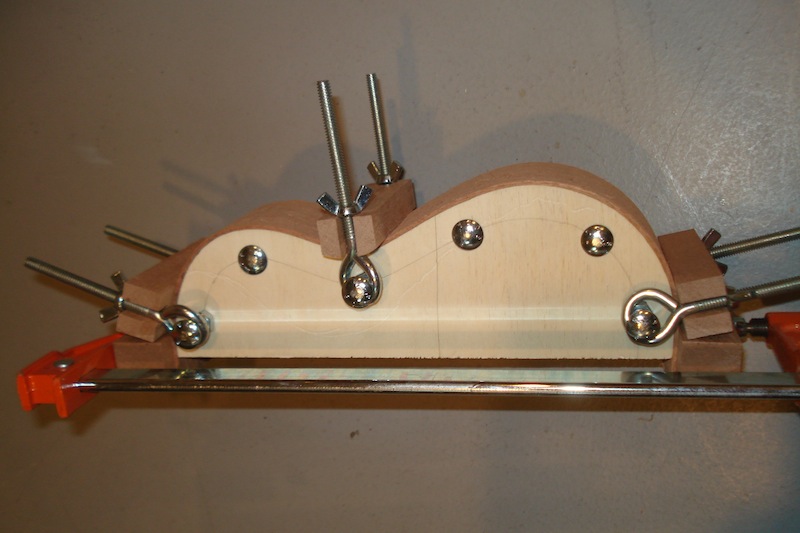
Today the sides were glued up with head and tail pieces. Cauls were used to hold the pieces in place while the glue dried. I also experimented with different type of linings for increasing the gluing area for the sides and top/bottom. The kit came with thin bindings but I am used to something a little more substantial so the photo shows both type in the jig for fitting purposes. The braces and bridge plate were glued to the tops and bottoms. Hide glue was used for all glue joints.
Friday, November 4, 2011
Ukulele Build Part 8
The 002 uke top had its inlay placed tonight. For this top I used two strips of black plastic binding to set off the rosette from the rest of the top. The inlay is a combination of mother of pearl and maple. I choose maple because I plan on using maple binding for the guitar body and these will match and tie into one another.
Wednesday, November 2, 2011
Ukulele Build Part 6
Tonight was fret installation night. The fret wire was cut to be a little wider than the fingerboard width. Because the finger baord has a binding on it, the fret wire needed to be under cut on the ends to allow it to hang over the binding material. A Stewart Mac fret nipper worked well for this and a fine file was used to clean up any remaining tang.
A fret hammer was used to seat the wire and a fret leveler was used to make the fret edges even with the binding as well as create the 30 degree beveled profile on the edge. A fine file was used to dress the fret edges and the fret crowns will be leveled on the uke since there might be changes to the flatness of the fret board once it is mounted.
Here is a photo of one of the mother of pearl palm trees for the head stock.
A fret hammer was used to seat the wire and a fret leveler was used to make the fret edges even with the binding as well as create the 30 degree beveled profile on the edge. A fine file was used to dress the fret edges and the fret crowns will be leveled on the uke since there might be changes to the flatness of the fret board once it is mounted.
Here is a photo of one of the mother of pearl palm trees for the head stock.
Tuesday, November 1, 2011
Ukulele Build Part 5
I am in the process of making the mother of pearl (MOP) palm trees for the head stock. The MOP was glued to a thin piece of basswood with white elmer's glue. This adds strength to the MOP and the elmers will release later with water.
This is my set up for cutting the pearl. The forked piece of cherry acts as the cutting support and the saw has a "medium" pearl saw blade in it (in the top photo the blade and pearl are held off to the side to show the fork). Many jigs for cutting pearl have a blower to keep the pearl clean from dust but I use a vacuum instead to spare my lungs from inhaling the fine silicon dust that sawing pearl generates (like talcum powder).
Here is the bending jig with cauls to hold the mahogany in place while it dries. The mahogany was soaked for an hour or so and then heated in an oven to 250 F with water soaked towels around it and aluminum foil around the towels. This softened up the wood enough to make it easily conform to the jig. You can also bend the wood without heating it but there is less chance of getting a crack if the wood is further softened by heating.
Next, 1000 W halogen lamps were used to dry and set the wood in the desired shape. When released from the jig, the side had just a little spring back to it but it will easily be able to fit into the building jig for the glue up. The jig is exactly the size of the uke with the thickness of the side pieces in place. I trimmed the side pieces while they were on the jig so they are flush with the jig and parallel to the center line.
This is my set up for cutting the pearl. The forked piece of cherry acts as the cutting support and the saw has a "medium" pearl saw blade in it (in the top photo the blade and pearl are held off to the side to show the fork). Many jigs for cutting pearl have a blower to keep the pearl clean from dust but I use a vacuum instead to spare my lungs from inhaling the fine silicon dust that sawing pearl generates (like talcum powder).
Here is the bending jig with cauls to hold the mahogany in place while it dries. The mahogany was soaked for an hour or so and then heated in an oven to 250 F with water soaked towels around it and aluminum foil around the towels. This softened up the wood enough to make it easily conform to the jig. You can also bend the wood without heating it but there is less chance of getting a crack if the wood is further softened by heating.
Next, 1000 W halogen lamps were used to dry and set the wood in the desired shape. When released from the jig, the side had just a little spring back to it but it will easily be able to fit into the building jig for the glue up. The jig is exactly the size of the uke with the thickness of the side pieces in place. I trimmed the side pieces while they were on the jig so they are flush with the jig and parallel to the center line.
Thursday, October 27, 2011
Ukulele Build Part 3
Here is the ebony fingerboard with mother of pearl inlays. The fret slots were cut with a .020 slitting blade in my Byrnes table saw so everything is good, square and true. I used a dremel with the Stewart Mac base to make the inlay recesses (please see the inlay post on this blog for more details). I also used a down cutting bit to level the MOP to the fingerboard after the epoxy dried. This saved a lot of hand finishing and time plus it protected the finger board from sandpaper dings in the leveling process. The other photo is of the head and tail blocks for the body.
Monday, October 24, 2011
Ukulele Build Part 2
This build might move along a little slower than most others because this one is going up live as the build goes on as opposed to most of the others which are retrospective. Tonight the sound hole and route for the rosette were cut. A Stewart Mac router base was used along with a 1/4 inch cutter to make the rosette route. A hole was drilled through the router base and the router and bit were nailed through the uke front with the nail forming a pivot for the router assembly. The same was done to cut out the sound hole. Masking tape was used to cover the router base to protect the top from any scratches. Both routes were perfectly round.
Saturday, June 11, 2011
Pinewood Derby 1966 AC Cobra
Here are a couple of photos of a 66 AC Cobra that I made for a pinewood derby a few years ago. I no longer have the car since I gave it away to a Cobra fan. The paint job is candy apple red over a white base with several layers of clear coat lacquer sprayed over it and buffed out.
Friday, May 20, 2011
HMS Triton Frigate Cross Section Build Log - Conclusion
Here are the final photos of the completed model, I hope that you enjoyed following along with the steps of its construction. This model received a Gold Award at the Midwest Model Ships and Boats Competition.
Thursday, May 19, 2011
Folding wooden book stand
This is this year's birthday present for my wife. She likes to do her Bible study at the table and I've noticed that she tends to prop up her Bible when she is studying so I designed and built this for her birthday. Because is fold up it can be taken with her wherever she goes.
The stand is made of maple and the wooden hinges were made with individual pieces since I don't have a drill with the length to make a single pass for drilling the hole for the brass hinge pins. The finish is shellac that has been buffed with 0000 steel wool for a fine matte finish.
Labels:
construction,
Finishing,
Maple,
Scratch Built,
Shellac,
Wood
Wednesday, May 11, 2011
HMS Triton Frigate Cross Section Build Log - Part 1
This is a log of the building of a 1:48 scale cross section of the British Frigate Triton from 1771. The highlights of this model's construction will be outlined in this series of posts. The plans for this model were originally posted on the ModelShipWorld forum. The model is made of cherry, holly, brass and sheet copper.
The first step was to build an assembly jig so that the individual frames of the hull can be precisely aligned.
The frames are made up from individual timbers, just like the full sized ship. These members form two layers (double frame) that together make for a very strong structure. This is a photo of the cut out members of one frame.
This is what the frame looked like when glued together.
Here is the completed frame along with the keel section and false keel. The keel has indexing pegs on its upper surface to make for a stronger joint with the frames. The little white dots on the frame are treenails (pronounced "trunnels") They are little wooden pegs that hold the members of the keel together.
The first step was to build an assembly jig so that the individual frames of the hull can be precisely aligned.
The frames are made up from individual timbers, just like the full sized ship. These members form two layers (double frame) that together make for a very strong structure. This is a photo of the cut out members of one frame.
This is what the frame looked like when glued together.
Here is the completed frame along with the keel section and false keel. The keel has indexing pegs on its upper surface to make for a stronger joint with the frames. The little white dots on the frame are treenails (pronounced "trunnels") They are little wooden pegs that hold the members of the keel together.
Wednesday, April 6, 2011
Wooden mixer rack
I needed a rack that would mount my mixer on an angle as well as allow airflow under it for cooling.
This rack is made of 1/4 inch basswood and the cross member slats that support the mixer are rabbeted into the front and rear supports for extra strength. A small lip was added to the front edge to keep the mixer from sliding off.
Wooden Pool Triangles
This year for my brother's birthday I made him a cherry and maple pool triangle. The three sides are made from a single blank of cherry with a swoosh of maple glued in as a laminate. To see how this is done, see the wooden bookmark post on this site. The three corners are equilateral triangles and rounded recesses are cut into each so that the balls touch each other and rack solidly (lesson learned from the Mark I version of these...). The rack is finished with 7 coats of nitrocellulose lacquer and polished to a mirror finish just like on the perfect guitar finish found elsewhere in this blog.
Pinewood Derby Hershey Bar and Bus
Here are the pinewood derby cars that Zac and I made this year.
His is the Hershey Bar and mine is the Webelos School Bus. He saw a Hershey bar car in an issue of Boy's Life magazine last year and he has been planning on building one all year. The car is super easy to build because there is no paint, just some aluminum foil and a Hershey's wrapper. Spray adhesive was used to secure the coverings and about 3 oz of weight had to be added to the car to make it 5 oz.
The Hershey Bar Car turned out to be really fast and won the Pinewood Derby. I think that having all of the weight in the rear and having a low center of gravity helped make this happen. My personal opinion is that the axles and wheels are most important part of getting the best speed possible. Well polished and true axles with good graphite as a lubricant is a must. Our pack does not allow increasing the wheel base but I am told this helps and running on three wheels helps reduce rolling resistance.
My car is the same as I usually make each time I am leading Webelos because it is the last year that the boys will be racing pinewood derby cars and I have the bus as a keepsake to remember them by. The photos are from their yearbook and all of the details on the bus are printed on decal paper. The bus is the opposite of the Hershey bar because it needs to be hollow to make it weigh 5 oz.
Friday, January 7, 2011
Scratch Built 1:12 Peterboro Canoe Conclusion
The hull is now surprisingly strong for its light weight and will get even stronger once the internal frames are added. Start by milling strips that are 1/16 by 1/32 inch in cross section.
These are soaked and bent over the approximate strongback frames. This will prevent them from kinking when inserted into the hull.
They are placed into the hull while damp and thin CA is used to glue them in place.
A strip of plastic works as a spacer and the frames are glued into place the whole length of the hull.
Once all are in place, trim the ends and sand flush with the sheer plank.
| ||
Three short segments of strip are used to finish off the planking of the stem and stern and a gentle curve is carved and sanded into these strips. The stem and stern pieces are trimmed down and a crown is made into the tops of these.
The decks are glued in place with a slight separation between the deck pieces at the far ends of these. This will be covered by a cap on top and a false keel at the ends.
As can be seen in this photo, there is plenty of excess material for forming the overhang on the hull.
Cap rails are cut and installed between the ends of the decks.
The interface between the cap rails and the decks are cleaned up and a gentle camber is sanded into the tops of the decks.
An even overhang is shaped in the cap rails and decks.
Deck caps are installed and trimmed to size.
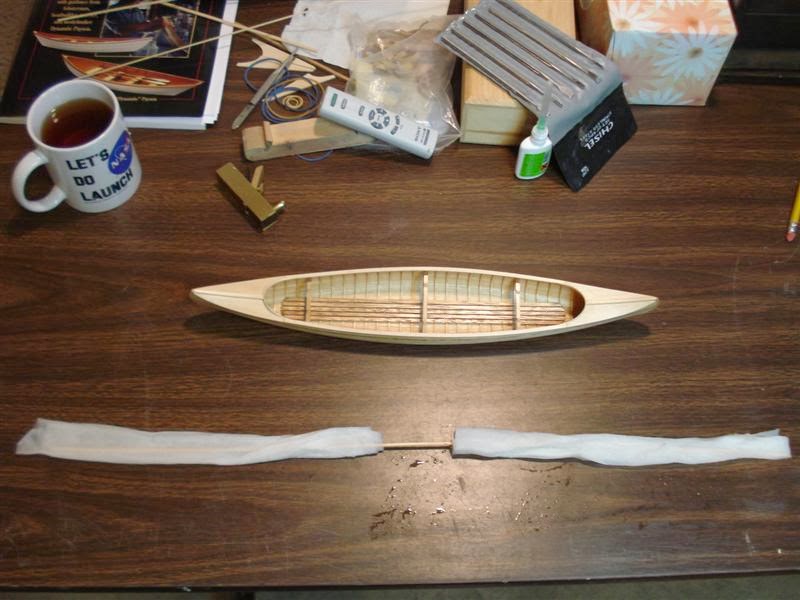
Here is a very effective method for soaking wood that works well if you don’t want to get a large container out to hold the planks. If the wood is very stiff and doesn't want to bend well, the water soaked plank/paper towel assembly can be micro-waved to steam the wood. I've used this technique several time with uniformly good success.
The false keel is bent to shape and installed onto the hull using rubber bands attached to the thwarts to hold it in place while the glue dries.
The cockpit combings are formed using a bending jig made of MDF and then are installed into place.
Trim and profile the combings once they are attached to the canoe.
Paddles can be made to accent the canoe display. For this particular canoe I chose traditional otter tail paddles. First find a pattern that you like and size the paddles to an appropriate length. In this case they end up being around 5 inches long. The various stages of production are shown here.
Make a pattern and trace out on basswood, cut out using a new and sharp knife. Use a plane or other tool to thin out the blade of the paddle.
Since I turn out the shafts on a drill press I carve a round section to insert into the drill press chuck. Turn the shaft.
Finish off the hand grip and smooth off the interfaces between the handle, shaft and blade.
Here is a photo of the completed canoes. The one in front has mahogany trim and the one in back cherry. The presentation plate has been placed on the first canoe while the second is still awaiting a suitable event for presentation. I hope that you've enjoyed following along.
Subscribe to:
Posts (Atom)